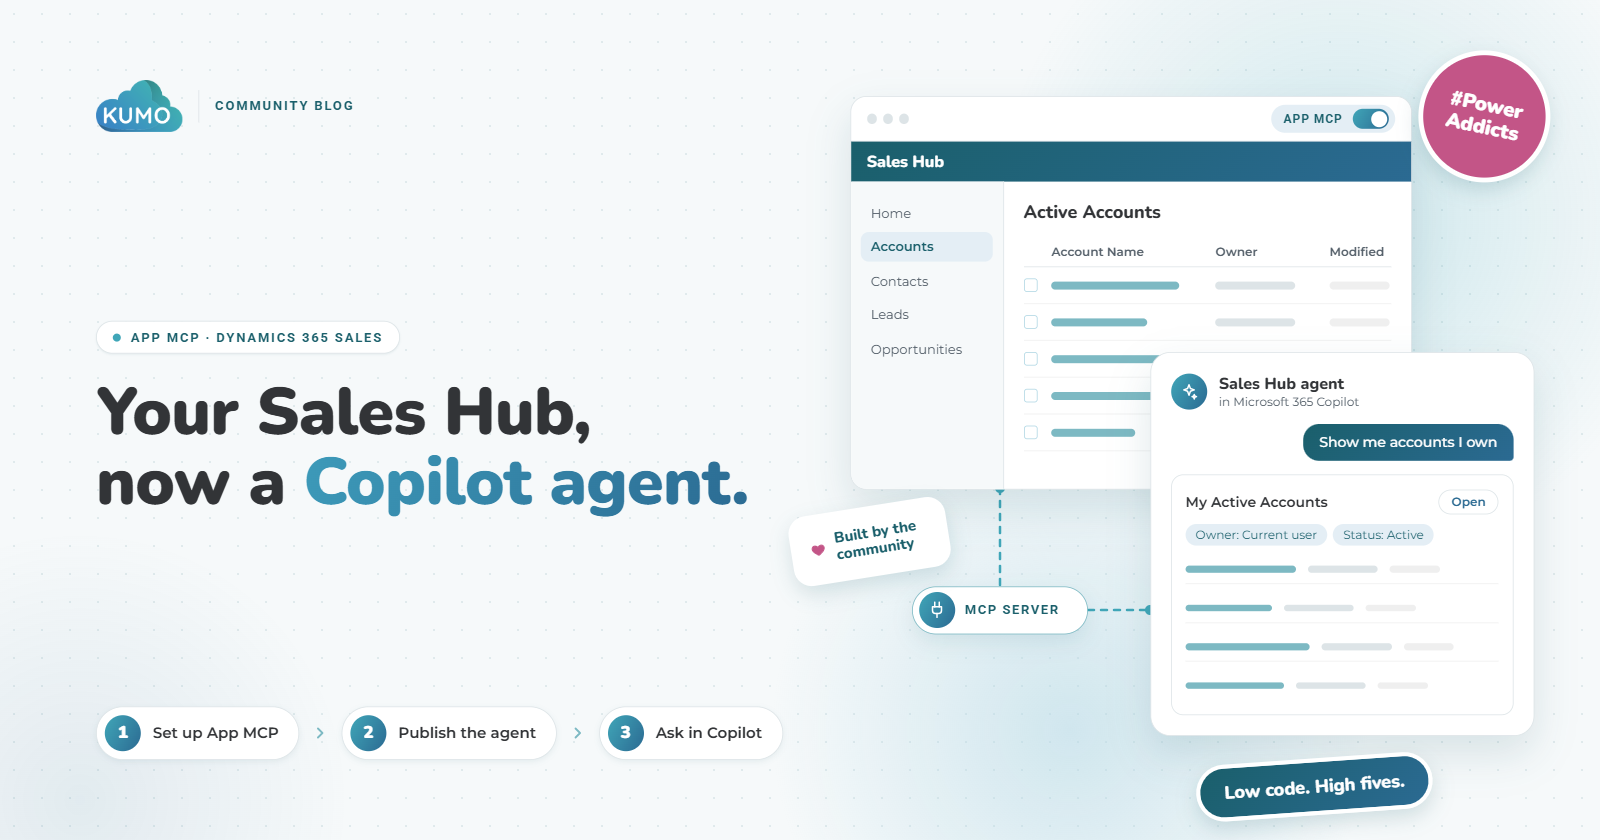
Continuing our 2026 campaign of building in the open, this one is a quick win we have been itching to share. Microsoft quietly shipped a preview feature called App MCP for model-driven apps, and it changes where your Dynamics 365 users can get work done. Instead of switching tabs into the Sales Hub, sellers can ask Microsoft 365 Copilot for their accounts and get back a real, interactive grid of live Dataverse data, right in the chat.
The best part? For an out-of-the-box app like Sales Hub, there is no code involved. In this article I will show you how to enable App MCP on the Dynamics 365 Sales Hub app and deploy it to Microsoft 365 Copilot, step by step.
Introduction: The Sales Hub Agent In Copilot
Chatbots are great at bringing back data and insights, but reviewing robust data in a chat window has always been difficult. A wall of text or a markdown table only goes so far when you need to sort, page through, and click into records. Agents have advanced significantly this year, and one of the key capabilities to arrive is support for interactive components: real UI rendered right inside the conversation. That is what lets us now bring the Dynamics 365 Sales Hub model-driven app directly into Copilot.
Here is what that looks like. A seller opens Microsoft 365 Copilot, selects the Sales Hub agent, and types “show me accounts I own.” Copilot responds with the My Active Accounts view from Sales Hub, already filtered to the current user, with sorting, paging, and links into each record.
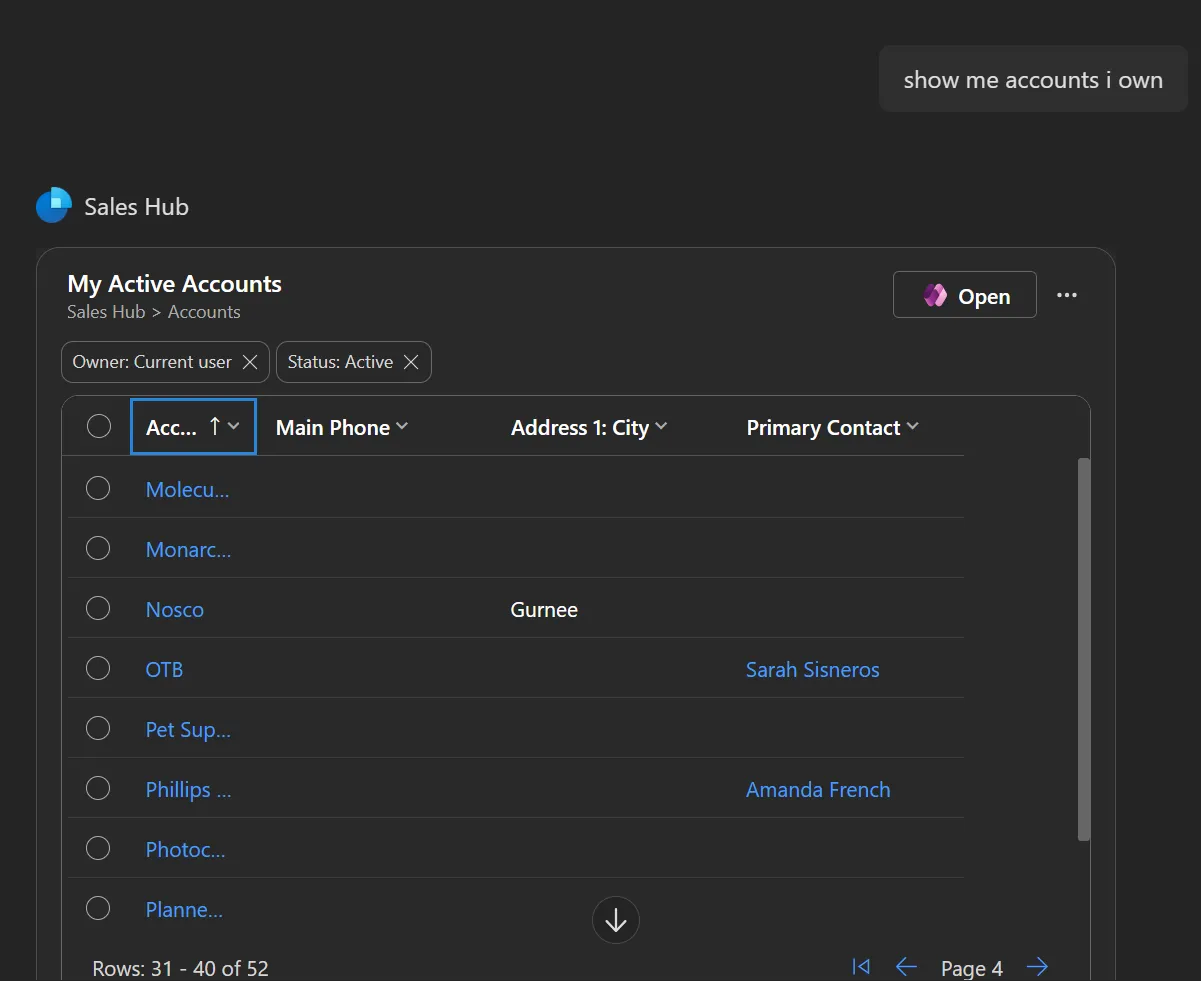
This is not a screenshot or a summary of the data. It is the app’s own view, rendered as an interactive widget through MCP Apps, an extension to the Model Context Protocol that lets an MCP server hand interactive UI back to the host. Power Apps generates the MCP server and a declarative agent from your app, and Copilot does the rest.
Prerequisites
Before you start, make sure you have the following in place. App MCP is a preview feature, so we recommend trying it in a sandbox environment before rolling it out to your whole sales team.
- A model-driven app - This feature only works with model-driven apps today. We are using the standard Dynamics 365 Sales Hub app.
- Microsoft 365 Copilot licenses - Both the maker deploying the agent and the end users chatting with it need one.
- Permission to deploy the agent - Either rights to upload custom apps in Microsoft Teams, or access to the Agents area of the Microsoft 365 admin center to publish it for your organization (the path we take below).
Open The Sales Hub App In The App Designer
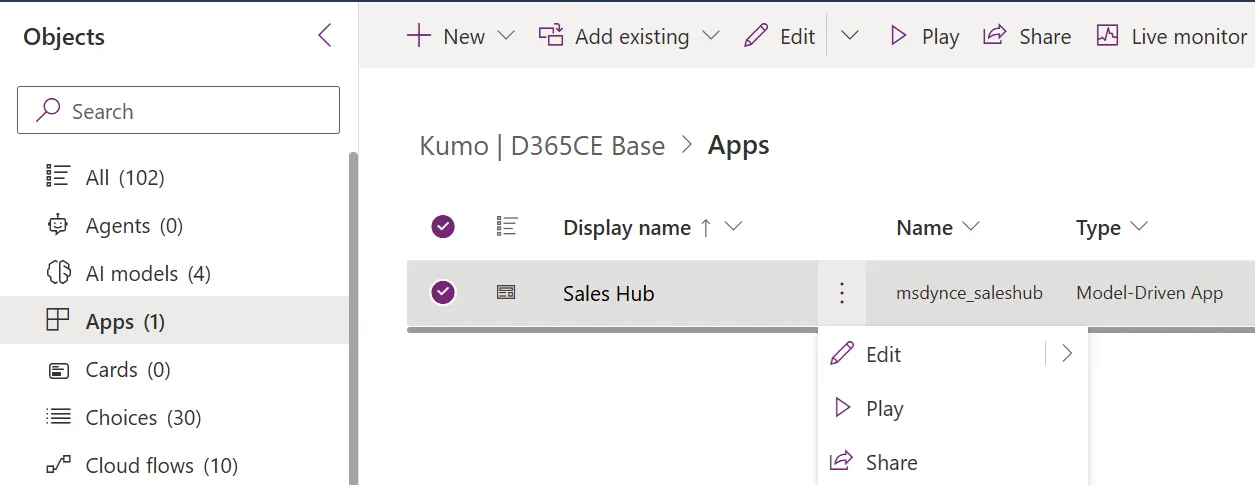
Go to Power Apps, select your Dynamics 365 environment, and open the solution that contains the Sales Hub app. Select Apps from the objects list, then select the three dots next to Sales Hub and choose Edit.
If you do not see the App MCP option in the next step, try opening the app from make.preview.powerapps.com instead. Preview features tend to land there first.
Set Up App MCP
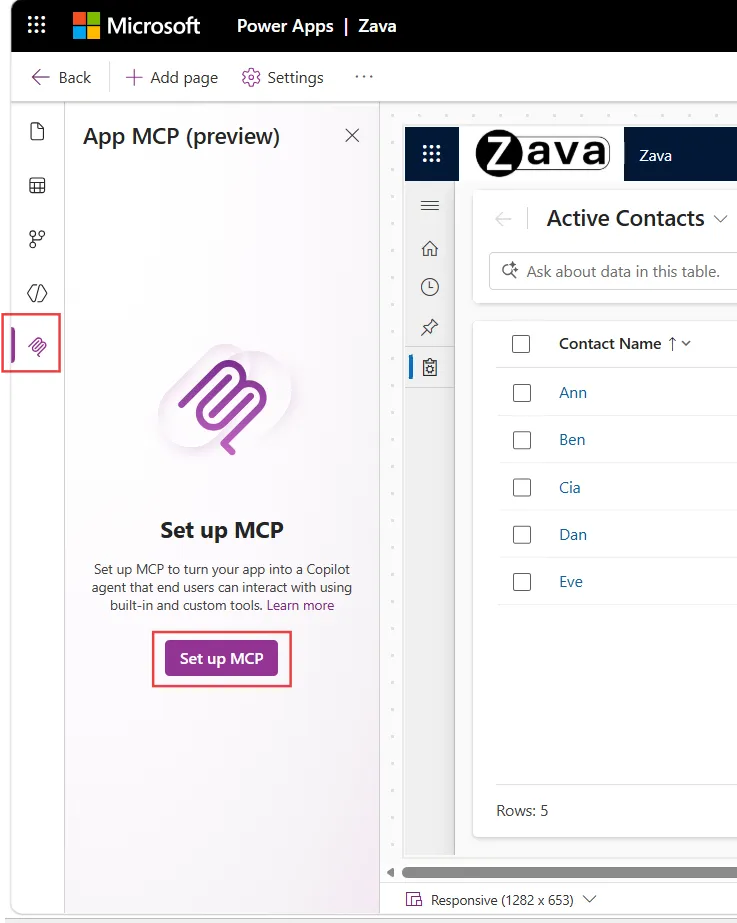
In the app designer, select the App MCP icon in the left navigation bar, then select Set up MCP. This generates the MCP server for the app and the tools Copilot uses to talk to it. It is a one-time step and only takes a few seconds.
Save, Publish, And Download The App Agent
Once setup finishes, Save and Publish the app. The App MCP pane now shows your app agent along with its tools. Out of the box, Sales Hub gets four built-in tools:
- create_record - Create a new record in a table from the conversation.
- view_record - Open an existing record as an interactive form.
- edit_record - Update a record without leaving Copilot.
- view_data - Display data from a Dataverse table in an interactive grid.
Select Download app agent to download the package. It is a zip file named similar to declarative-agent-<app name>.zip and contains the agent definition, the built-in tools, and the configuration Copilot needs to host it.
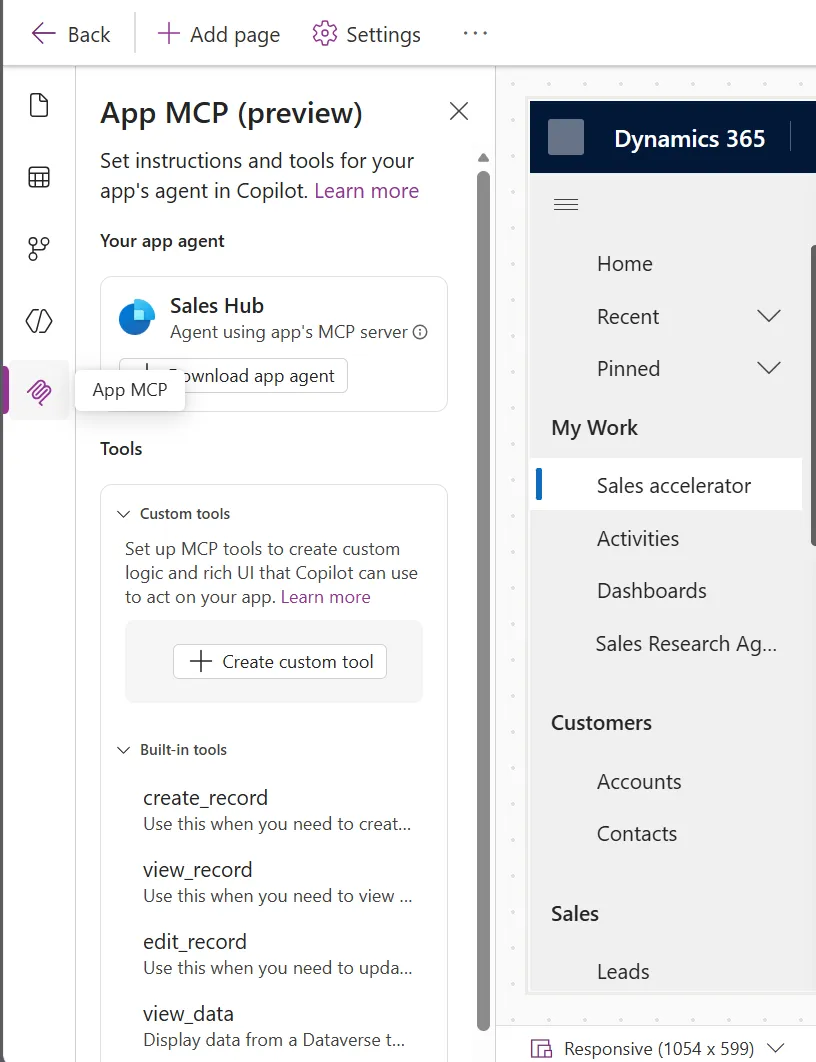
You will also notice a Custom tools section with a Create custom tool button. We will come back to that at the end.
Upload The Agent In The Microsoft 365 Admin Center
Now we deploy the package to our users. Open the Microsoft 365 admin center and go to Agents > All agents. Select the three dots above the agent list, then select Add agent and upload the zip file you just downloaded.
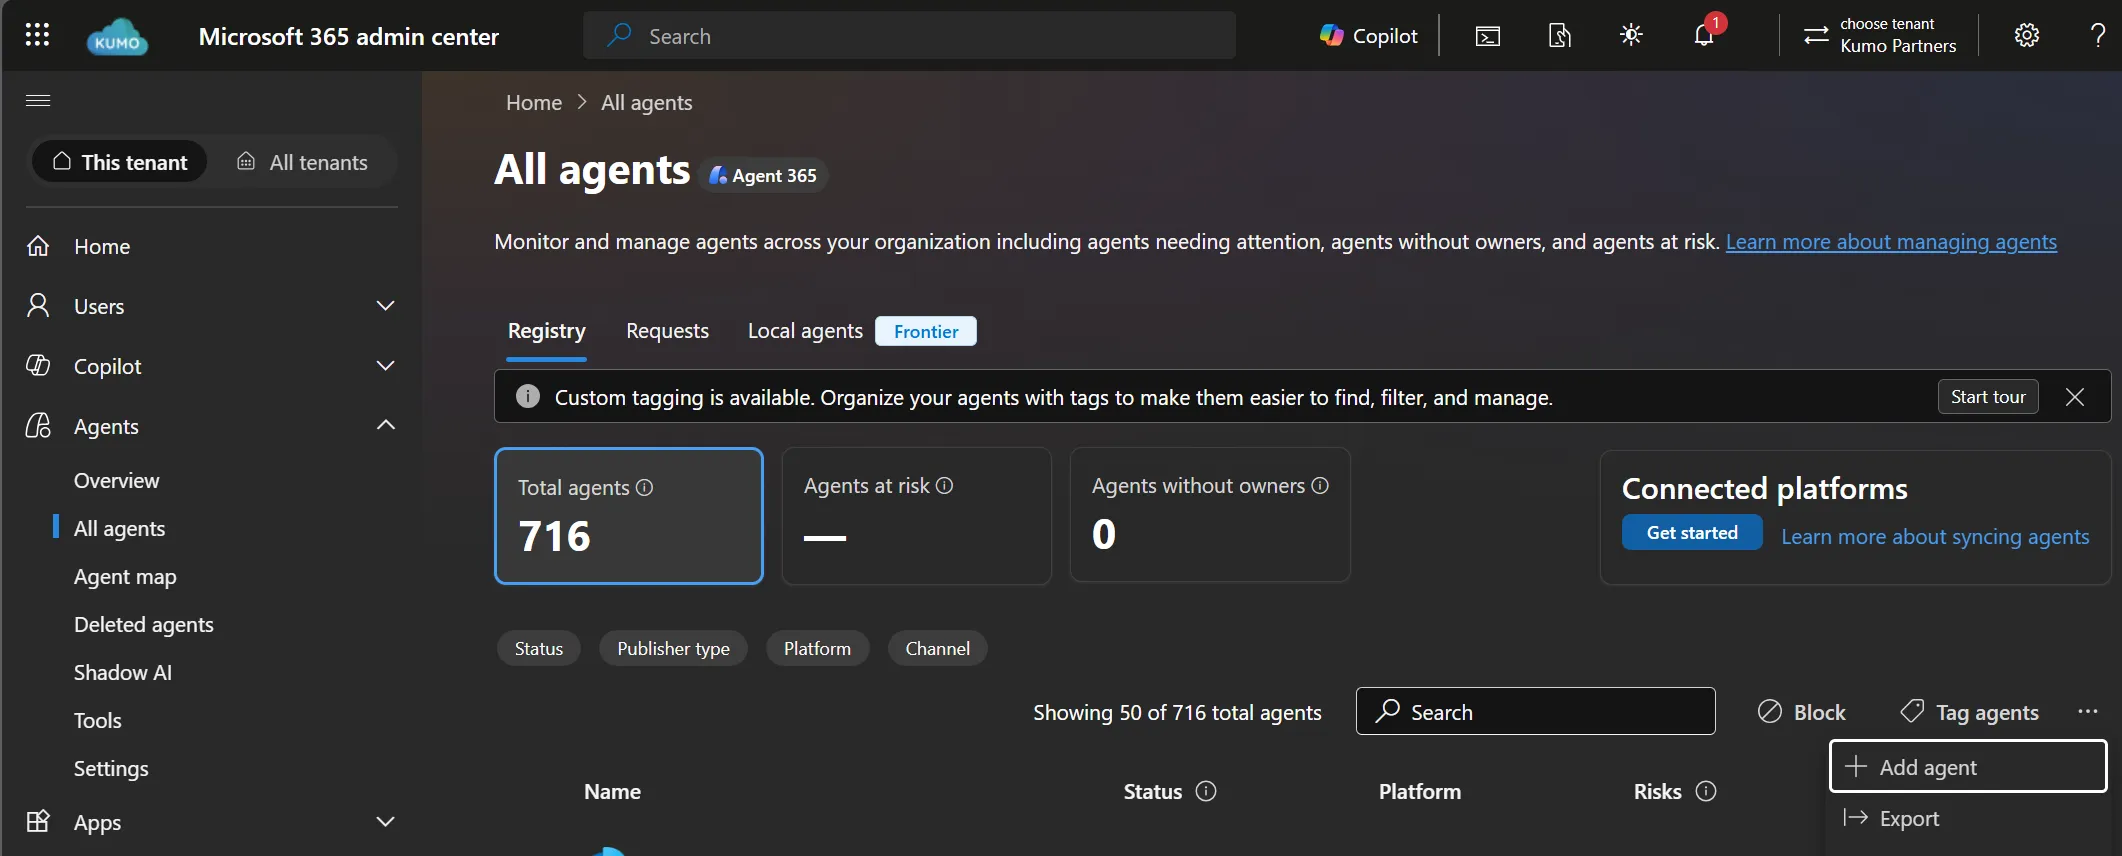
Once it processes the file, share the agent with all users or, more ideally, with specific user groups (your sales team, for example), and then finish importing.
If you only want to test it yourself first, you can instead upload the same zip as a custom app in Microsoft Teams for personal use.
Find Sales Hub In The Agent Store
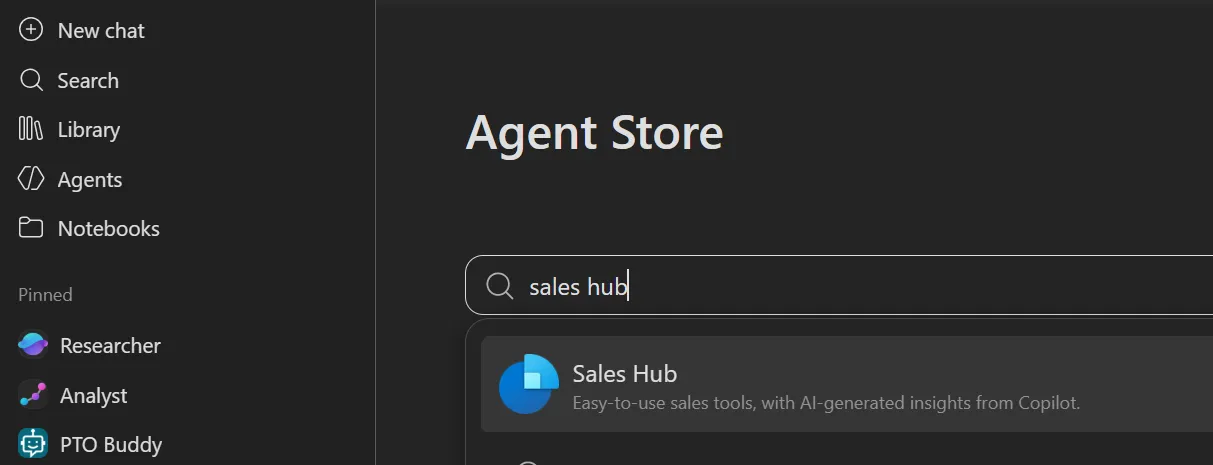
Open Microsoft 365 Copilot and go to Agents to open the Agent Store. Search for “sales hub” and select the Sales Hub agent to add it. Pin it while you are there so it stays one click away.
Ask Sales Hub For Your Data
Start a chat with the Sales Hub agent and ask a question about your data in plain English. As we showed in the introduction, “show me accounts I own” returns the My Active Accounts grid with an Owner: Current user and Status: Active filter already applied. Select Open to jump straight into the full Sales Hub view, or select any account name to drill into that record.
Where it gets interesting is follow-up prompts. The default view did not show the columns we cared about, so we just asked for them:

Before anything runs, Copilot asks for confirmation to call the app’s MCP server. Expand the details and you can see exactly what it is about to do: call the view_data tool against the account table, using the My Active Accounts view, with ownerid, primarycontactid, and modifiedon as the requested fields. The primary name column (account name) is always included, so it did not need to be listed.
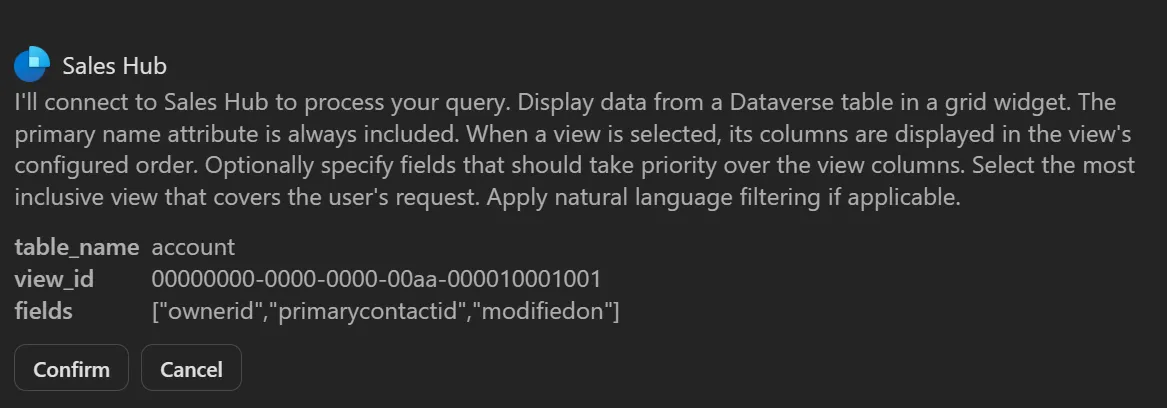
Select Confirm, and the grid comes back with the columns we asked for, still filtered to our active accounts.
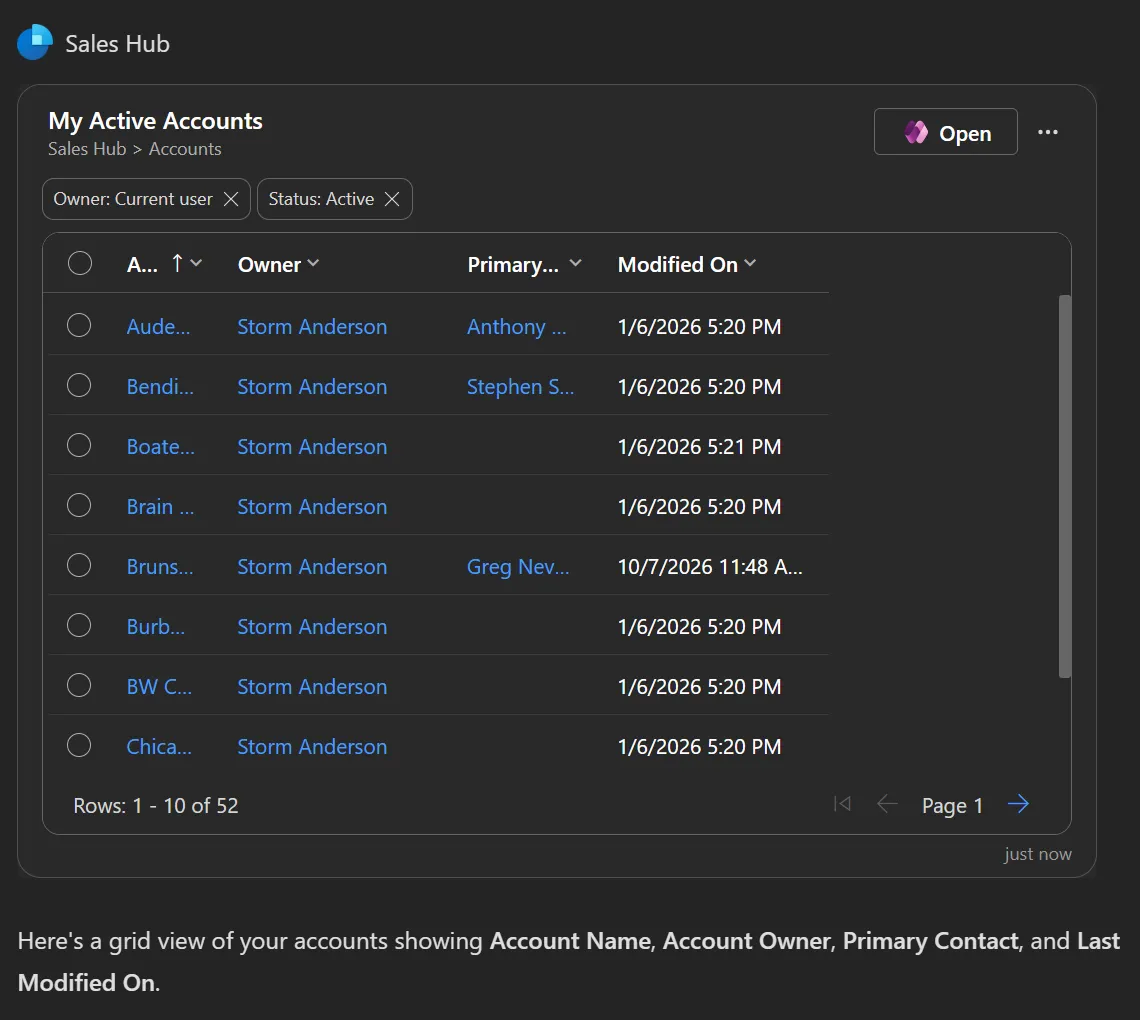
That confirmation card is worth a second look. Copilot did not write a query from scratch. It translated a plain-English request into a structured tool call against a view that already exists in your app, and then layered the requested fields on top. The views, columns, and tables your team has already configured in Sales Hub become the vocabulary the agent works with.
Where To Go From Here: Custom Tools
The built-in tools cover the everyday asks: browse, view, create, and edit. The Create custom tool option in the App MCP pane is where this goes a step further. A custom tool pairs a prompt (with instructions to query specific records and return JSON) with optional custom HTML, so Copilot can render your own UI, such as a pipeline chart or a deal timeline, alongside the conversation. Copilot can also chain tools together, feeding the output of one into the next.
After adding a custom tool, download the updated app agent and upload the new version through the admin center the same way you did above. One heads-up: if you see “This feature has been disabled” when creating a custom tool, the AI prompts setting needs to be turned on for the environment in the Power Platform admin center.
In Closing
This is one of those features that looks small on paper but changes the day-to-day for a sales team. Sellers already live in Teams and Copilot, and now the app they log their pipeline in can come to them, live, filtered, and interactive, without anyone writing a line of code. For Dynamics 365 customers already licensed for Microsoft 365 Copilot, it is about as low-effort as an AI rollout gets.
It is still a preview, so we would start with a pilot group, keep an eye on how users phrase their requests, and let that feedback shape which custom tools to build next. If you want to see what else the app agent can do inside the app itself, check out our practitioner’s guide to building custom UI with the Power Apps app agent.